發表文章

目前顯示的是 2021的文章

Disable nouveau and install NVIDIA Driver on Ubuntu

圖片
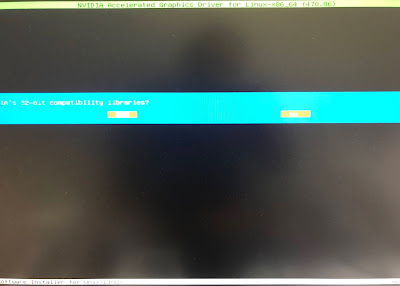
1. Download NVIDIA from  https://www.nvidia.com/Download/index.aspx?ncid=afm-chs-44270&ranMID=44270&ranEAID=a1LgFw09t88&ranSiteID=a1LgFw09t88-buxlbcTUvQEV.eZv3z3a3g if driver is in  https://www.nvidia.com/Download/driverResults.aspx/184163/en-us , driver filename is NVIDIA-Linux-x86_64-470.94.run 2. download make, gcc, dkms  and vim from apt-get $ apt install gcc make vim libglvnd-* 3. touch and edit /etc/modprobe.d/blacklist-nouveau.conf to add below content blacklist nouveau options nouveau modset=0 4. run update-initramfs command $ sudo update-initramfs -u 5. change boot target and reboot to multi-user.target by command systemctl $ sudo systemctl set-default multi-user.target $ sudo systemctl reboot 6. enable execuate driver file  NVIDIA-Linux-x86_64-470.94.run and run it $ cd ~/Download $ sudo chmod 755 NVIDIA-Linux-x86_64-470.94 $ sudo ./NVIDIA-Linux-x86_64-470.94 --dkms 7. add min/max icon https://itsfoss.com/click-to-minimize-ubuntu/ gsettings set org.gnome.shell.ex

Hides file or folder on MacOS

圖片
1. Open terminal from Application folder 2. chflags hidden file_or_folder_path            #maybe drag and drop icon from Finder flags: hidden / nohidden 3. To display Hidden files or folders, press keys combination  command + shift + . reference https://www.howtogeek.com/211496/how-to-hide-files-and-view-hidden-files-on-mac-os-x/

程式碼執行無法繼續,因為找不到VCRUNTIME_1.dll on Windows 11

圖片
 安裝Office 2019 Professional至 Windows 11 會出現以下錯誤 此時只要去以下Microsoft網站下載 Microsoft Visual C++ Redistributable Latest Supported Downloads 2015-2022 for ARM64 https://aka.ms/vs/17/release/vc_redist.arm64.exe for X86 https://aka.ms/vs/17/release/vc_redist.x86.exe for X64 https://aka.ms/vs/17/release/vc_redist.x64.exe references https://answers.microsoft.com/zh-hant/windows/forum/all/vcruntime140dii/e99dbbce-6d1e-44c1-aad1-3e3f28edf227 https://docs.microsoft.com/en-us/cpp/windows/latest-supported-vc-redist?view=msvc-170#visual-studio-2015-2017-2019-and-2022 https://docs.microsoft.com/zh-TW/cpp/windows/latest-supported-vc-redist?view=msvc-170

Generate Private/Public key pair for SSH connection on MacOS / Linux

圖片
 1. use keygen on Client PC to generate ed25519 key pair stored in ~/.ssh/, their default name are id_ed25519 and id_ed25519.pub, and the account names on Client PC and Server are the same.    # .pub is public key and non .pub is private key $ ssh-keygen -t ed25519               #you should setup a passphrass 2. check and copy the public key to remote server $ ssh-copy-id -n YourAccount@YourServer  # YourAccount stands for the account names on Client PC and Server, -n: try run $ ssh-copy-id  YourServer 3. connect by ssh tunnel form client to Server as figure 1. $ ssh YourAccount@YourServer      # authenticate with  passphrass only, not account password on Server (Figure 1.) 4. Finally, if you want to passwordless login with ssh, empty passphrase while executing ssh-keygen processing References LPIC-1 STUDY GUILDE, SYBEX

MS Windows MediaCreationTool selection tools

圖片
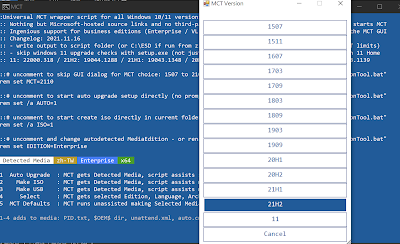
1. Goto https://github.com/AveYo/MediaCreationTool.bat 2. download and execute MediaCreationTool.bat in unziped folder references  https://gist.github.com/AveYo/c74dc774a8fb81a332b5d65613187b15 https://www.tenforums.com/tutorials/9230-download-windows-10-iso-file.html#option3

Add new language and typing on Ubuntu 20.04 LTS (Focal Fossa)

圖片
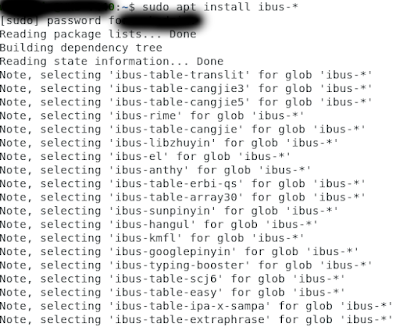
1. Press Ctrl + Alt + T to open terminal 2. apt-get install ibus-zhuyin ibus-pinyin ibus-chewing or apt-get install ibus-*                       3. logout and login again (p.s. maybe run startx command to start x-window) 4. setting -> Region & Language 5. click + upon Manage Installed Languages 3. Choose Install / Remove Languages                         reference https://askubuntu.com/questions/59356/how-do-i-get-chinese-input-to-work https://www.programmersought.com/article/22294071374/

Install Nvidia Driver on Ubuntu 20.04 LTS(Focal Fossa)

圖片
 1. Download NV Driver form https://www.nvidia.com/Download/index.aspx?lang=en-us 2. Install development tools $ sudo apt-get update $ sudo apt-get install build-essential libglvnd-* 3. Install make  $ sudo apt-get install ubuntu-make 4. Execute and compile driver binary (eg. NVIDIA-LINUX-x86_64-470.86.run) $ sudo chmod  a+x ./NVIDIA-LINUX-x86_64-470.86.run $ ./NVIDIA-LINUX-x86_64-470.86.run                   or 1. $ apt-cache search nvidia-driver or $ sudo add-apt-repository ppa:graphics-drivers $ sudo apt-get update 2.  $ sudo ubuntu-drivers devices       3. install recommended $ sudo apt-get install nvidia-driver-515 4. check driver $ nvidia-smi  5. modify setting by GUI $ sudo nvidia-settings   6. GUI method installation of drivers search driver in search and apply changes by additional drivers repository       references https://blog.eldernode.com/install-development-tools-on-ubuntu/ https://www.ibm.com/docs/zh-tw/visual-insights?topic=SSC5ZE/com.ibm.vi.doc/config/t_inst_nvidi

Blob video download to file via Web browser and VLC Player

圖片
1. Go to to analytic mode on browser 2. refresh webpage 3. search .m3u8 file extension 4. copy url and paste it to VLC player network file, and click Stream output 5. Choose Settings and input file name you would like, enable Display the stream locally,  as well as video codec is h264 and  Audio codec is mp3 individually. 6. Finally click OK and Click Open in step 4 figure. FFmpeg method: ffmpeg -protocol_whitelist file,http,https,tcp,tls,crypto -i "[blob_url]" -c copy video.mp4 references https://stackoverflow.com/questions/42901942/how-do-we-download-a-blob-url-video https://stackoverflow.com/questions/14952052/convert-blob-url-to-normal-url https://superuser.com/questions/1260846/downloading-m3u8-videos

Use GUI Remote Control on MacOS, Linux and Windows

 1. VNC https://tigervnc.org/ https://www.tightvnc.com/download.php https://macappstore.org/tigervnc-viewer/  https://www.realvnc.com/en/connect/download/vnc/macos/ 2. NoMachine NX https://www.nomachine.com/ 3 Xrdp https://github.com/neutrinolabs/xrdp https://apps.apple.com/tw/app/microsoft-remote-desktop/id1295203466?l=en&mt=12 4. SPICE https://www.spice-space.org/download.html https://virt-manager.org/download/ 5. flexVDI https://flexvdi.com/en/downloads

Driver path on MS Windows 10

圖片
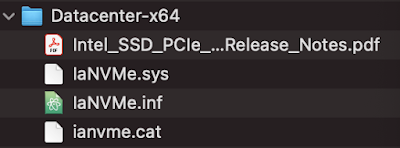
 1. Download Intel NVMe client driver (Client-X64.zip) from https://www.intel.com/content/www/us/en/download/19172/client-nvme-microsoft-windows-drivers-for-intel-ssds.html 2. unzip packages downloaded 3. copy IaNVMe.inf to  %SystemRoot%\inf or C:\Windows\INF 4 copy IaNVMe.sys to %SystemRoot%\System32\driver 5. copy ianvme.cat to %SystemRoot%\System32\CatRoot References https://community.osr.com/discussion/100783/where-does-the-cat-file-go-during-signed-driver-installation https://docs.microsoft.com/en-us/windows-hardware/drivers/install/using-inf2cat-to-create-a-catalog-file https://answers.microsoft.com/en-us/windows/forum/all/driver-folders-in-windows/3641eef8-b647-49cb-b746-e2b49c8a1d19

macOS / MS Windows 的Adobe Acrobat PDF列印標楷體異常

圖片
 MacOS 下的PDF送印至FujiXerox等PostScript印表機若列印出來如下圖,只有標楷體異常,如娃娃體或破字,在MS Windows下發生也可以此方式改善。 1. 在列印時開啟印表機的進階選項(Advanced) 2. 勾選以影像方式列印(Print as image),如下圖,就可解決文字編碼轉換成印表機語言之問題。  

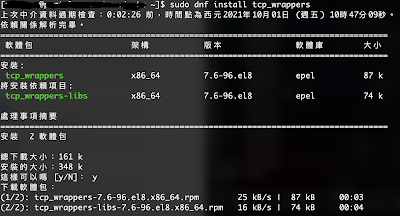
CentOS 8 install tcp_wrappers to protect from tcp malicious connection

圖片
 1.                2. Configurate /etc/hosts.deny and /etc/hosts.allow ALL: in.fingerd: sshd: in.tftpd: portmap:   References https://pkgs.org/download/libwrap.so.0()(64bit)

Brightness blink problem on Dell Vostro laptop

圖片
 1. download and install latest IGD and NVIDIA driver Intel Xe IGD https://www.intel.com/content/www/us/en/download/19344/intel-graphics-windows-dch-drivers.html Intel DSA https://www.intel.com/content/www/us/en/support/detect.html NVIDIA driver https://www.nvidia.com.tw/Download/index.aspx?lang=tw https://www.nvidia.com.tw/Download/driverResults.aspx/180692/tw

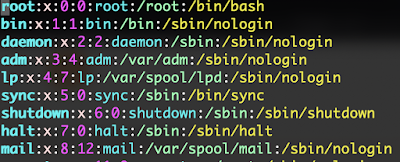
Structure of /etc/passwd file

圖片
Login name : Filtered pass : User ID : Group ID : Full name : Home path : Default Shell

YUM/yum options on CentOS/RHEL Linux

$sudo yum deplist  [Package]       # Display Dependencies for a package $sudo yum list avaliable   # List package names from repositories $sudo yum list installed $sudo yum update         # update one or all packages on your system $sudo yum update [Package] $sudo yum search [term]     # Search name and description from a term $sudo yum install [Package]  #Install a package from a repository to your system $sudo yum remove [Package]   #erase a package [ and possible dependencies ] from a repository to your system $sudo yumdownloader  [Package] #download a package from a repo to current directory   references https://access.redhat.com/sites/default/files/attachments/rh_yum_cheatsheet_1214_jcs_print-1.pdf https://access.redhat.com/articles/yum-cheat-sheet

Use Linux commnad wall to broadcast message with nobanner

圖片
1. wall -n 2. enter your message to broadcast 3. Ctrl+D reference https://www.howtoforge.com/linux-wall-command/

Disable Web service on CISCO 9300 Catalyst Switch

圖片
1. ssh  [cisco-ip] -l [cisco-account]  #  prompt > 2. enable   # to enable mode 3. configure terminal 4.  no ip http server no ip http secure-server references https://community.spiceworks.com/topic/136566-securing-cisco-catalyst-2960-web-interface https://www.techwalla.com/articles/how-to-use-keyboard-interactive-authentication-with-putty

MS IIS with Letsencrypt SSL/TLS on MS Windows

圖片
 1. download win-acme from https://www.win-acme.com Ex. version 2.1.18 https://github.com/win-acme/win-acme/releases/download/v2.1.18/win-acme.v2.1.18.1119.x64.pluggable.zip 2. unzip win-acme.v2.1.18.1119.x64.pluggable.zip 3. execute wacs.exe  with cmd.exe to run  as administrator 4. Modify web.config to rewrite  https with IIS rewrite module https://www.iis.net/downloads/microsoft/url-rewrite   references https://www.ssl.com/how-to/redirect-http-to-https-with-windows-iis-10 https://aboutssl.org/iis-redirection-http-to-https https://ruslany.net/2009/04/10-url-rewriting-tips-and-tricks Letsencrypt ACME https://letsencrypt.org/en/docs/client-options

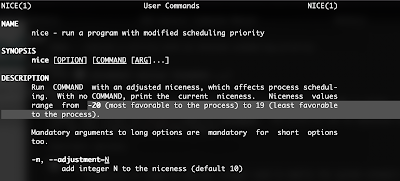
Command Nice increment differentitaton on CentOS Linux and BSD of MacOS

圖片
 1. Linux-like -20 ~ 19 2. BSD-like -20 ~ 20

vim /vi 操作列數與游標

Ctrl+G (顯示游標在第幾列) 1. 跳到文件第一列 Command mode 編輯模式 gg Input mode 指令模式 :0 2. 跳到文件 最後 一列 Command mode G (capital G) Input mode :$  3.游標往 左,下,上,右 h 左   j 下    k 上   l 右  4. 存檔並離開   Command mode ZZ  Input mode :wq  5. Ctrl + f   到下一頁 Ctrl + p   回上一頁 6. dd 刪除整列 yy 複製整列 p 貼上複製列於游標後 7.  :set number      顯示列數 :set nu :set nonumber 隱藏列數 :set nu! :set nonu References https://vim.rtorr.com/ https://bcc16.ncu.edu.tw/6/vi/vi01.html

Use Let's Encrypt cerbot on CentOS 7 with apache

圖片
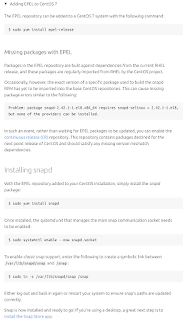
The latest setup is to install snapd package firstly https://certbot.eff.org/lets-encrypt/centosrhel7-apache

MS Windows 10 KB5004237 patch 更新問題或發生藍屏

1. 請先移除如 Sophos, Avast 等防毒軟體 2. services.exe停用Windows update服務後,刪除 C:\Windows\SoftwareDistribution\ 內的所有檔案與資料夾 3. services.exe啟用Windows update,並重新啟動系統 4. 開始->控制台->更新與安全性->更新修復 5.跟隨更新步驟,重開機

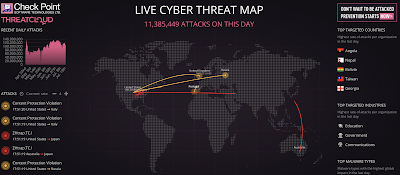
Threat map geography 各種即時網路威脅地圖

圖片
https://threatmap.checkpoint.com / http://threatmap.fortiguard.com / https://livethreatmap.radware.com/ https://cybermap.kaspersky.com /  https://map.lookingglasscyber.com / https://www.imperva.com/cyber-threat-attack-map /  https://www.fireeye.com/cyber-map/threat-map.html  Taiwan is one of TOP 5 targeted countries on 2021/07/21   Banking Trojans 為首?臺灣的銀行被入侵為高頻率?!

shorten URL security issues and prevent them

1. use + sign behind of shortened URL eg. If URL is https://bitly.com/GVBQJS manually input https://bitly.com/GVBQJS+ 2. unshorten them with below website http://urlxray.com/ https://unshorten.it/ reference https://safecomputing.umich.edu/be-aware/phishing-and-suspicious-email/shortened-url-security

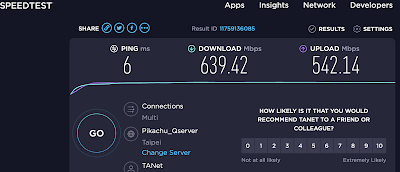
各家網路速度測試 Network Speed Test

圖片
 1. speedtest.net https://www.speedtest.net/             2. Netflix https://fast.com/zh/tw/  3. Google   https://projectstream.google.com/speedtest 4. AT&T https://www.att.com/support/speedtest/   5. speed.io https://www.speed.io/ 6. speedcheck.org https://www.speedcheck.org/    7. NTU speed test http://speed5.ntu.edu.tw/

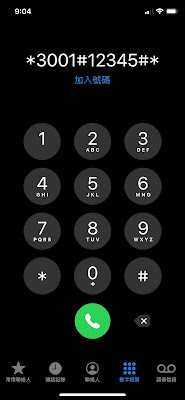
How to show dashboard and metrics of iPhone

圖片
                                                                     references https://www.tmonews.com/2015/10/latest-band-12-lte-sightings-in-florida-california-kentucky-and-massachusetts/

CISCO IOS instructions with enable mode

圖片
> en => enable #config t  => config -> terminal   config)# hostname  portal config)# interface f0/1 => interface FastEthernet0/1 config-if)# no shutdown     @ vlan setting  wifi and cable locate at different vlan tag, eq wifi is at second-vlan @ create vlan 3 directly

Capture audio on Mac OS by OBS

圖片
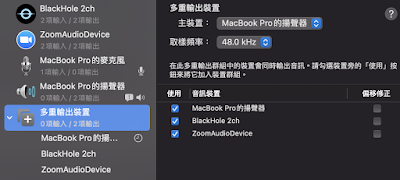
1. download blackhole 2ch version from https://existential.audio/blackhole / and install  2. open audio MIDI Setup.app and clikc left down + sign to add new Multi Output Device Select MacBook Pro both Speaker and BlackHole 2ch         3. move cursor to Multi Output Device and right click mouse to set it to be the default speaker 4. download OBS app from https://obsproject.com/download and install it 5. execute OBS App and and choose Audio Output Capture                   6. Choose Device is BlackHole 2ch and click OK, and then Audio Mixer will have fluctuant channel bars as follow figures                       7. Click Start Recording and the video file will be stored in ~/movie folder by default.     refereces https://streamlabs.com/content-hub/post/capturing-desktop-audio-in-streamlabs-obs-for-mac