發表文章

目前顯示的是 5月, 2018的文章

CentOS 6/7 安裝常用較官方之 YUM 套件Repository

圖片
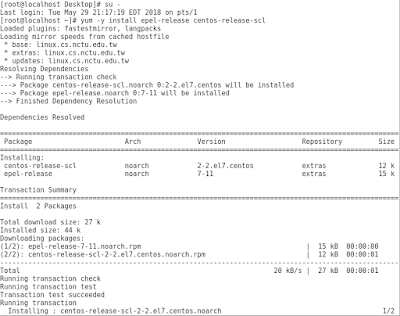
安裝完 CentOS Linux 後,還會缺乏某些套件,故必要先安裝YUM套件庫後,往後便能利用yum下載想要的套件,如以下步驟: 1. su - 2. yum -y install epel-release  centos-release-scl 3. CentOS 7 安裝 php72 可從 我的 github下載 script 若需做 Let's Encrypt 的 https,執行以下步驟 1. yum -y install yum-utils 2. yum-config-manager --enable rhui-REGION-rhel-server-extras rhui-REGION-rhel-server-optional 3. yum install certbot-apache 4. certbot --apache 5. certbot -a dns-plugin -i apache -d "*.yourdomain.com" -d example.com --server https://acme-v02.api.letsencrypt.org/directory 6. 再執行 crontab -e 編輯cron內容,加入以下: 0 0,12 * * * python -c 'import random; import time; time.sleep(random.random() * 3600)' && certbot renew 7. 其他系統使用Let's Encrypt https請參考 https://certbot.eff.org/ 參考如下: https://wiki.centos.org/SpecialInterestGroup/SCLo https://fedoraproject.org/wiki/EPEL https://certbot.eff.org/lets-encrypt/centosrhel7-apache (圖一)

遠端連線 Windows Server 2016 發生 CredSSP 加密 Oracle 補救

圖片
遠端連線 Windows Server 2016 卻發現出現 CredSSP 加密 Oracle 補救,如圖一 為由於Windows 更新所造成,可由以下方法排除: 1. 可先從 Windows Update Catalog 網站下載您的連線端(客戶端)與被連線端(伺服器端)更新檔 KB4093120 https://www.catalog.update.microsoft.com/Search.aspx?q=KB4093120 如連線端為 Windows 10 x64      被連線端為 Windows Server 2016 x64 下載接安裝更新 2. 在連線端可執行 gpedit.msc,若是家用版,要先修改(https://www.microsoft.com/zh-TW/download/details.aspx?id=48257) 接著進入電腦設定 -> 系統管理範本 -> 系統 -> 認證委派 -> 設定名稱 加密 Oracle 補救, 選擇 保護層級降為易受攻擊即可 3. 或是可以使用登陸檔編輯程式 regedit,編輯 HKEY_LOCAL_MACHINE\SOFTWARE\Microsoft\Windows\CurrentVersion\Policies\System\CredSSP\Parameters 值名稱  AllowEncryptionOracle 值型態 DWORD 4. 若為 Home edition ,可從原廠網站下載 本機群組原則 https://www.microsoft.com/zh-TW/download/details.aspx?id=48257 以上完成後,須重開機才能運行。 參考資料 參考連結 https://support.microsoft.com/ zh-tw/help/4093492/credssp- updates-for-cve-2018-0886- march-13-2018 https://blogs.technet.microsoft.com/yongrhee/2018/05/09/after-may-2018-security-update-rdp-an-auth

MariaDB / MySQL 手動建立資料庫與使用帳號

1. 安裝完套件後執行 mysql_secure_installation 2. 用root登入,並輸入上一步設定的密碼 mysql -u root -p 3. 新增資料庫,並設定語系編碼 create database mydb  characer set = utf8mb4  collate =  utf8mb4_general_ci ; 4. 新增使用者,並設定密碼 create user dbuser @ localhost  identified by ' mypasswd' ; 5. 新增使用者對資料庫權限 grant all privileges on mydb.* to dbuser @ localhost ; 6. 匯入您再別台機器匯出的.sql資料庫,如檔名為 export.sql mysql -u dbuser -p mydb < export.sql 接著就可以用使用者dbuser登入了 以上藍色字為隨個人喜好與需求變更。 若要改變使用密碼 可利用以下指令 mysql -u root -p 登入後 use mysql; update user set password=password('yourpass')  where user='username' and host='localhost'; flush privileges; 參考 https://www.tecmint.com/change-mysql-mariadb-root-password/

Mac OS X讀寫 NTFS, ExtFS, XFS

圖片
可透過Mac第三方套件安裝管理程式 Homebrew https://brew.sh/ MacPort https://www.macports.org/install.php NTFS 1. 如Linux利用FUSE(https://en.wikipedia.org/wiki/Filesystem_in_Userspace), 先下載FUSE for macOS 並安裝 https://github.com/osxfuse/osxfuse/releases 2. ntfs-3g for mac https://github.com/osxfuse/osxfuse/wiki/NTFS-3G https://sourceforge.net/projects/catacombae/?source=typ_redirect 付費:下載Tuxera的 ntfs-for-mac https://www.tuxera.com/products/tuxera-ntfs-for-mac/download/ 3. ntfs-3g open source 資源 https://www.tuxera.com/community/open-source-ntfs-3g/ 或利用 2 Paragon-Software 免費版:http://www.paragon-drivers.com/tw/free/ 最新版:https://www.paragon-software.com/ufsdhome/zh/ntfs-mac/ 關於 ExtFS 1. https://github.com/alperakcan/fuse-ext2 https://sourceforge.net/projects/fuse-ext2/ 2. Paragon-Software https://www.paragon-software.com/ufsdhome/zh/extfs-mac/

macOS X 安裝微軟標楷或其他字型

圖片
1. 右上角搜尋放大鏡圖示,點選後輸入 字體簿 2. 出現如圖一之視窗,點選上方之 + 再選擇您要加入的字型檔案,如 kaiu.ttf, edukai.ttf, ebas927.ttf 或 .ttc 格式檔案,從您作業系統C:\Windows\Fonts 複製出來之檔案格式。 再選擇確定即可,警告之小問題可略過。 3. 這樣 LibreOffice文件即可看到原本從Windows系統寄件的字型了。 (圖一)