發表文章

目前顯示的是 5月, 2020的文章

微軟的惡意軟體移除工具

請下載以下工具並安裝它 https://www.microsoft.com/en-us/download/details.aspx?id=9905 https://www.microsoft.com/zh-tw/download/details.aspx?id=9905 幾乎每個月會發行最新版本,代號為KB890830 ( 爸救您,爸閃您 ),可透過 Update Catalog 查詢所有版本 https://www.catalog.update.microsoft.com/Search.aspx?q=KB890830 參考資料 https://support.microsoft.com/zh-tw/help/890830/remove-specific-prevalent-malware-with-windows-malicious-software-remo https://support.microsoft.com/en-us/help/890830/remove-specific-prevalent-malware-with-windows-malicious-software-remo
Enable Read-Only for USB on Windows

圖片
1. Search -> regedit.exe 2. My_Computer -> HKEY_LOCAL_MACHINE -> SYSTEM -> CurrentControlSt -> Control Add Key, name is StorageDevicePolicies and add DWORD under folder StorageDevicePolicies, its name is WriteProtect value is 1 (enable) 3. Reboot and copy a file to portable USB disk for testing, and it alarms write-protected and please remove protection mode 4. gpedit.msc Computer configuration -> Administrative Template -> All configuration  -> Removable Storage Write Access Refernces https://www.windowscentral.com/how-enable-write-protection-usb-devices-windows-10 https://www.lifewire.com/remove-write-protection-windows-10-8-7-4586905

匯入 iphone 所有相片與影片至Windows 10 (可匯入所有iphone資料夾內檔案,包含下載資料夾)

圖片
1. 搜尋照片app並點選滑鼠兩下執行App (圖一) 2. 插入 iphone 並允許該電腦存取檔案 3. 在圖一右上角選取匯入-> 來自USB裝置,此時會搜尋所有U插上USB裝置內的照片與影片,如圖二 (圖二) 4. 再選擇您要存的檔案到對應的Windows個人文件內影片或照片資料夾, 並在該資料夾找尋即可 (圖三) 參考資料 https://support.microsoft.com/zh-tw/help/4027134/windows-10-import-photos-and-videos-from-phone-to-pc

文字轉語音 text2speech

利用google文字轉語音,可以重複撥放注意事項 https://soundoftext.com / https://responsivevoice.org / http://www.fromtexttospeech.com/ https://text2speech.us/ 文字轉擬真人語音,連這個也要搞政治洗腦 https://ttsdemo.com/

好用的背景音樂資料庫

https://www.bensound.com/ 付費型 https://www.premiumbeat.com References https://www.pbs.gov.tw/cht/index.php?code=list&ids=33&show_code=list&id=2

zone-h 查詢被駭網站

http://www.zone-h.org/archive https://www.robtex.com references  https://owasp.org/www-project-top-ten/ https://www.informationsecurity.com.tw/article/article_detail.aspx?aid=8452

使用Windows 10安全性(defender)勒索軟體防護避免被加密個人資料

圖片
近日勒索軟體攻擊頻繁,建議開啟Windows 10 安全性內的勒索軟體保護,以避免從網路下載的安裝程式或執行程式,進行加密寫入磁碟內資料夾的動作 1. 右下角盾牌形狀icon進入後,選擇畫面內下方管理勒索軟體防護 2. 開啟受控資寮夾存取權,隨後從網路下載的Filemora 9 會出現安裝失敗,因無法在 MyDocument產生  Wondershare Filmora 9資料夾,從網路下載之軟體確實無法寫入已被保護的資料夾Documents、Pictres、Videos、Music、Favorites 3. 選擇受保護資料夾,可加入自訂資料夾可免於被加密寫入

Installing freeNAS v11.3 on Acer Alto C110

圖片
1. download freeNAS iso from below https://www.freenas.org/download-freenas-release / 2. Build a bootable USB disk by Rufus app https://3ctoolman.blogspot.com/2019/10/booting-rufus.html https://rufus.ie/ 3. Plug-in usb port and boot from external USB booting (Press F2 to go into BIOS setting) 4. booting from external USB 5. choose Install/Ugrade freeNAS  6. System claim 8GB of RAM is recommended, but you can confirm and tab to click <Yes> 7. Choose A Disk of OS location, please setup a HDD/SSD hardware indepedently, excluding softRAID / RAID  Virtual Device . At the next, Setting up your Password 8.  Choose Boot via BIOS is easier to maintain and be recommanded 9. Reboot by pressing OK 10. Open your browser on other computer and press freeNAS IP from prompting mode(1-11), it will reveal below GUI, please add your disk pool and data pool fir

2020 Q1 HDD Stats Report by Backblaze

https://www.backblaze.com/blog/backblaze-hard-drive-stats-q1-2020/ 看起來 Seagte 4、8、10、12T 與 Toshiba 的 14T 故障率高出許多 2019 同季參考 https://www.backblaze.com/blog/backblaze-hard-drive-stats-q1-2019/

VMware Tools Packages

Tools https://packages.vmware.com/tools/ ESXI https://packages.vmware.com/tools/esx/ references https://packages.vmware.com/tools

LSI Web BIOS configure RAID 1+0 10

圖片
1. Reboot System and Press Ctrl+H to go into LSI Web BIOS Configuration 2. Show all hardware disks in Physical View WIndows 3. Go into Configuration Wizard 4. Choose Manual Configuration 5. Setup Drive Group (DG Array) for Raid-1 of DG0 6. Setup Drive Group (DG Array) for Raid-1 of DG1 7. Add DG0 and DG1 to Span Virtual Disk, then click Next 8.Click Update Size for Virtual Disk and Choose RAID 10 at left column, other settings are in default. After tune all parameter of virtual disk, please select Accept 9. Write Through mode alert, please select Yes 10.Construct New Vritual Drive and Initialization alert, please select Yes , 11. Build up a Virtual Drive of 7.275TB and status is optimal 12. Assign Virtual Drive is a Bootable Drive 13. Check Disks Consiste

Installation of Jitsi Meet Server on Ubuntu

圖片
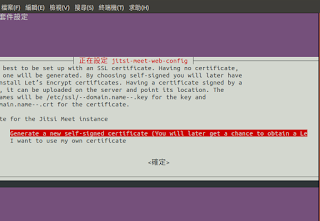
1.open port of http/https permission use ufw allow 2. wget  https://download.jitsi.org/jitsi-key.gpg.key && sudo apt-key add jitsi-key.gpg.key 3 sudo  echo ' deb https://download.jitsi.org stable/' > /etc/apt/sources.list.d/jitsi-stable.list 4. sudo  apt update && sudo apt install jitsi-meet jigasi jicofo jitsi-videobridge curl vim     5. select self-signed if you do not have TLS certificate   6. Obtaining a certificate from Letsencrypt website sudo  add-apt-repository ppa:cerbot/cerbot && sudo apt install certbot   7.Install certbot sudo /usr/share/jitsi-meet/scripts/install-letsencrypt-cert.sh 8. Allow port from ufw command sudo ufw allow 80/tcp sudo ufw allow 443/tcp  sudo ufw allow 4443/tcp sudo ufw allow 3478/udp sudo ufw allow 10000-20000/udp sudo ufw enable  9. Add authentication for host sudo vim /etc/prosody/conf.avail/yourhost.cfg.lua authectication="anonymous" change to au

Update ASUS ROG BIOS B450-I Gaming mainboard

圖片
1. Download BIOS file from ASUS Website https://www.asus.com/Motherboards/ROG-STRIX-B450-I-GAMING/HelpDesk_BIOS / 2. Store latest BIOS file in C: or USB Disk 3. Reboot and Click Del until displaying UEFI BIOS 4. Choose Tab of Tool and select ASUS EZ Flash 3 Utility 5. choose via Storage Devices(s) and click Next 6. select downloaded BIOS file from storage C:  or your usb disk tag from left path 7.Confirm your choice and click to write firmware 3. Upgrading done and reboot automatically

Open Source Apps Solution

Backup Duplicati https://www.duplicati.com/download FreeNAS https://download.freenas.org/11.3/STABLE/U2.1/x64/FreeNAS-11.3-U2.1.iso Xigmanas (FreeBSD base), some problem at LSI RAID 10 https://sourceforge.net/projects/xigmanas / https://sourceforge.net/projects/xigmanas/files/XigmaNAS-12.1.0.4/ OpenMediaVault (Debian base) https://www.openmediavault.org/download.html https://sourceforge.net/projects/openmediavault/files / Amahi (Fedora base mediastation) http://www.amahi.org / Email and Documentation Zimbra https://www.zimbra.com/downloads/ https://www.zimbra.com/downloads/zimbra-collaboration-open-source/ for ubuntu 18 https://files.zimbra.com/downloads/8.8.15_GA/zcs-8.8.15_GA_3869.UBUNTU18_64.20190918004220.tgz for RHEL 7 https://files.zimbra.com/downloads/8.8.15_GA/zcs-8.8.15_GA_3869.RHEL7_64.20190918004220.tgz for RHEL 6 https://files.zimbra.com/downloads/8.8.15_GA/zcs-8.8.15_GA_3869.RHEL6_64.20190918004220.tgz Net Meeting Jitsi https://desktop.jits

U Meeting, Cisco Webex, Microsoft Teams, Skype, Zoom各大視訊軟體簡易操作手冊

U Meeting and U Webinar https://www.acc.ntu.edu.tw/ITsupport/?p=1074 Cisco Webex https://www.acc.ntu.edu.tw/ITsupport/?p=1109 Microsoft Teams and Skype https://www.acc.ntu.edu.tw/ITsupport/?p=1140 Zoom https://www.acc.ntu.edu.tw/ITsupport/?p=1191

TEJ下載之.csv檔有亂碼

圖片
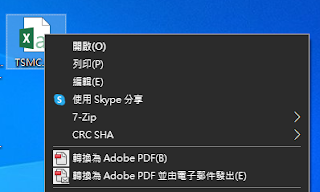
從TEJ下載之 .csv 檔用Excel 或 Office 365開啟會產生亂碼,則使用以下方式修改 .csv 檔編碼方式。 1. 對檔案按滑鼠右鍵選編輯 ,會利用notepad開啟,如下圖 2. 選擇另存爲...,將如下圖之下方編碼改為UTF-8 或 具有 BOM的UTF-8 3. 再用Excel開啟,或用 Notepad++ 開啟檔案 除以上方式,亦直接先開啟Excel,再透過 Excel 上方 Tab 的資料 -> 從文字檔 -> 直接匯入即可