發表文章

目前顯示的是 11月, 2021的文章

Generate Private/Public key pair for SSH connection on MacOS / Linux

圖片
 1. use keygen on Client PC to generate ed25519 key pair stored in ~/.ssh/, their default name are id_ed25519 and id_ed25519.pub, and the account names on Client PC and Server are the same.    # .pub is public key and non .pub is private key $ ssh-keygen -t ed25519               #you should setup a passphrass 2. check and copy the public key to remote server $ ssh-copy-id -n YourAccount@YourServer  # YourAccount stands for the account names on Client PC and Server, -n: try run $ ssh-copy-id  YourServer 3. connect by ssh tunnel form client to Server as figure 1. $ ssh YourAccount@YourServer      # authenticate with  passphrass only, not account password on Server (Figure 1.) 4. Finally, if you want to passwordless login with ssh, empty passphrase while executing ssh-keygen processing References LPIC-1 STUDY GUILDE, SYBEX
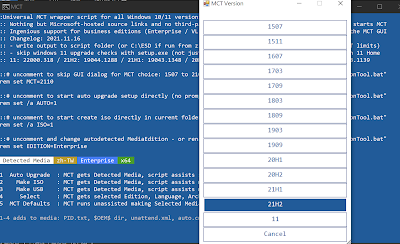
MS Windows MediaCreationTool selection tools

圖片
1. Goto https://github.com/AveYo/MediaCreationTool.bat 2. download and execute MediaCreationTool.bat in unziped folder references  https://gist.github.com/AveYo/c74dc774a8fb81a332b5d65613187b15 https://www.tenforums.com/tutorials/9230-download-windows-10-iso-file.html#option3

Add new language and typing on Ubuntu 20.04 LTS (Focal Fossa)

圖片
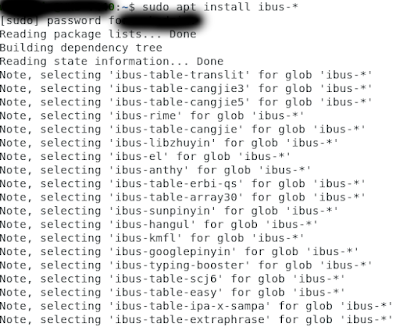
1. Press Ctrl + Alt + T to open terminal 2. apt-get install ibus-zhuyin ibus-pinyin ibus-chewing or apt-get install ibus-*                       3. logout and login again (p.s. maybe run startx command to start x-window) 4. setting -> Region & Language 5. click + upon Manage Installed Languages 3. Choose Install / Remove Languages                         reference https://askubuntu.com/questions/59356/how-do-i-get-chinese-input-to-work https://www.programmersought.com/article/22294071374/

Install Nvidia Driver on Ubuntu 20.04 LTS(Focal Fossa)

圖片
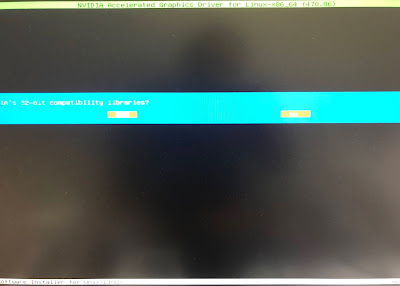
 1. Download NV Driver form https://www.nvidia.com/Download/index.aspx?lang=en-us 2. Install development tools $ sudo apt-get update $ sudo apt-get install build-essential libglvnd-* 3. Install make  $ sudo apt-get install ubuntu-make 4. Execute and compile driver binary (eg. NVIDIA-LINUX-x86_64-470.86.run) $ sudo chmod  a+x ./NVIDIA-LINUX-x86_64-470.86.run $ ./NVIDIA-LINUX-x86_64-470.86.run                   or 1. $ apt-cache search nvidia-driver or $ sudo add-apt-repository ppa:graphics-drivers $ sudo apt-get update 2.  $ sudo ubuntu-drivers devices       3. install recommended $ sudo apt-get install nvidia-driver-515 4. check driver $ nvidia-smi  5. modify setting by GUI $ sudo nvidia-settings   6. GUI method installation of drivers search driver in search and apply changes by additional drivers repository       references https://blog.eldernode.com/install-development-tools-on-ubuntu/ https://www.ibm.com/docs/zh-tw/visual-insights?topic=SSC5ZE/com.ibm.vi.doc/config/t_inst_nvidi

Blob video download to file via Web browser and VLC Player

圖片
1. Go to to analytic mode on browser 2. refresh webpage 3. search .m3u8 file extension 4. copy url and paste it to VLC player network file, and click Stream output 5. Choose Settings and input file name you would like, enable Display the stream locally,  as well as video codec is h264 and  Audio codec is mp3 individually. 6. Finally click OK and Click Open in step 4 figure. FFmpeg method: ffmpeg -protocol_whitelist file,http,https,tcp,tls,crypto -i "[blob_url]" -c copy video.mp4 references https://stackoverflow.com/questions/42901942/how-do-we-download-a-blob-url-video https://stackoverflow.com/questions/14952052/convert-blob-url-to-normal-url https://superuser.com/questions/1260846/downloading-m3u8-videos

Use GUI Remote Control on MacOS, Linux and Windows

 1. VNC https://tigervnc.org/ https://www.tightvnc.com/download.php https://macappstore.org/tigervnc-viewer/  https://www.realvnc.com/en/connect/download/vnc/macos/ 2. NoMachine NX https://www.nomachine.com/ 3 Xrdp https://github.com/neutrinolabs/xrdp https://apps.apple.com/tw/app/microsoft-remote-desktop/id1295203466?l=en&mt=12 4. SPICE https://www.spice-space.org/download.html https://virt-manager.org/download/ 5. flexVDI https://flexvdi.com/en/downloads

Driver path on MS Windows 10

圖片
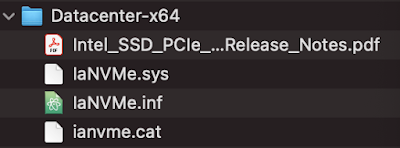
 1. Download Intel NVMe client driver (Client-X64.zip) from https://www.intel.com/content/www/us/en/download/19172/client-nvme-microsoft-windows-drivers-for-intel-ssds.html 2. unzip packages downloaded 3. copy IaNVMe.inf to  %SystemRoot%\inf or C:\Windows\INF 4 copy IaNVMe.sys to %SystemRoot%\System32\driver 5. copy ianvme.cat to %SystemRoot%\System32\CatRoot References https://community.osr.com/discussion/100783/where-does-the-cat-file-go-during-signed-driver-installation https://docs.microsoft.com/en-us/windows-hardware/drivers/install/using-inf2cat-to-create-a-catalog-file https://answers.microsoft.com/en-us/windows/forum/all/driver-folders-in-windows/3641eef8-b647-49cb-b746-e2b49c8a1d19