Installing freeNAS v11.3 on Acer Alto C110
1. download freeNAS iso from below
https://www.freenas.org/download-freenas-release/
2. Build a bootable USB disk by Rufus app
https://3ctoolman.blogspot.com/2019/10/booting-rufus.html
https://rufus.ie/
3. Plug-in usb port and boot from external USB booting
(Press F2 to go into BIOS setting)
4. booting from external USB
5. choose Install/Ugrade freeNAS
6. System claim 8GB of RAM is recommended, but you can confirm and tab to click <Yes>
7. Choose A Disk of OS location, please setup a HDD/SSD hardware indepedently, excluding softRAID / RAID Virtual Device. At the next, Setting up your Password
8. Choose Boot via BIOS is easier to maintain and be recommanded
9. Reboot by pressing OK
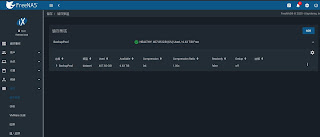
10. Open your browser on other computer and press freeNAS IP from prompting mode(1-11), it will reveal below GUI, please add your disk pool and data pool first before sharing files, folders and services.
11. Portal dashboard webpage
12 Look at hardware disk and the booting disk must stand alone.


