發表文章

自動產生blowfish字串網站

http://www.passwordtool.hu/blowfish-password-hash-generator https://www.question-defense.com/tools/phpmyadmin-blowfish-secret-generator https://bcrypt-generator.com/ https://webnet77.net/cgi-bin/helpers/crypthelp.pl http://aspirine.org/htpasswd_en.html https://www.browserling.com/tools/bcrypt

MySQL8 於 CentOS 7/RHEL安裝後預設密碼

圖片
利用yum 安裝 MySQL 8 後(https://dev.mysql.com/doc/refman/8.0/en/linux-installation-yum-repo.html,https://dev.mysql.com/downloads/repo/yum/), 或 wget https://dev.mysql.com/get/mysql80-community-release-el7-2.noarch.rpm yum localinstall  mysql80-community-release-el7-2.noarch.rpm yum install mysql-community-server 安裝後 mysql 之管理帳號 root已經不再是空密碼,需先找尋預設密碼,才能繼續使用mysql_secure_installation 接著搜尋預設密碼,利用指令grep $ su - $ grep 'temporary password' /var/log/mysqld.log 若要搭配phpMyAdmin使用會發生cache_sha2_password問題 (圖一) 請記得修改如以下 msyql -u root -p >alter user 'root'@'localhost' identified with mysql_native_password by 'password'; 參考如下 https://dev.mysql.com/doc/refman/8.0/en/linux-installation-yum-repo.html https://dev.mysql.com/doc/refman/8.0/en/upgrading-from-previous-series.html#upgrade-caching-sha2-password

利用bcdboot 重建啟動引導

圖片
1. 利用安裝開機片或 WinPE開機,進入命令提示字元cmd.exe,如圖一 2. 輸入指令diskpart,並輸入 list vol 來列出磁碟分割,原本\windows存放位置可能為c: 3. 選擇 Label 為 SYSTEM 的啟動磁碟(100或幾百MB),指令 select volume 4. 視 select volume情況,掛上磁碟tag,指令 assign letter z: ,也可能不需要,如圖二 5. 下指令 bcdboot c:\Windows /s Z: /f UEFI BCD指令 https://docs.microsoft.com/en-us/previous-versions/windows/it-pro/windows-8.1-and-8/hh824874(v=win.10)?redirectedfrom=MSDN (圖一) (圖二) 參考資料: https://www.asus.com/tw/support/FAQ/1011477 https://www.diskpart.com/articles/windows-error-0xc00000e9-7201.html

Windows 10 版本資訊

https://www.microsoft.com/zh-tw/itpro/windows-10/release-information https://www.microsoft.com/zh-tw/software-download/vlacademicwindows10iso?4cd9df4f-deef-4431-9497-a04303f34986=True

Boot Camp 安裝 MS Windows 10 1803或以上版本 遇到錯誤

圖片
因 MS Windows 10 的 ISO 光碟檔 install.wim 超過 4G,無法讓Boot Camp 切割格式化出來的 FAT3 BootCamp磁區放入,故Boot Camp Assistant製作會出現錯誤,故必須利用切割 install.wim方式分成 install.swm 與 install2.swm,每個檔2G左右,來載入重整過的 ISO 安裝檔,如下工具: Boot Camp ISO Converter 參考自: https://twocanoes.com/using-larger-windows-10-isos-with-boot-camp-assistant/ https://docs.microsoft.com/en-us/windows-hardware/manufacture/desktop/split-a-windows-image--wim--file-to-span-across-multiple-dvds https://msdn.microsoft.com/zh-tw/library/windows/hardware/dn938329(v=vs.85).aspx

CentOS7 GRUB 重建方式

GRUB1.X 1. 使用DVD或USB Boot啟動Linux光碟 2. 按下 F5 或 輸入 linux rescue 進入救援模式 3. 選擇 mount /mnt/sysimage 4. 輸入 grub-install /dev/sda 假如開機曹為 /dev/sda 5. 用 vi 看一下/etc/grub.conf 或 /boot/grub/grub.conf ,不同Linux Distribution有不同的位置。 6.重啟動 GRUB2.x 1.指令需 root 權限     mount / /dev/sdb1 #假設拔到另一台作業系統,或是Live DVD 或是 Ctrl+D修復模式下 2.  grub-install --root-directory=/ /dev/sdb 3.  update-grub2   1. Boot from boot DVD or usb iso image 2. Press F5 or type linux rescue to enter the rescue environment 3. Select the option to allow mount system root partition in /mnt/sysimage or type chroot /mnt/sysimage 4. type grub-install /dev/sda to reinstall GRUB boot loader, if your Linux boot partition in /dev/sda 5. Check /etc/grub.conf or /boot/grub/grub.conf for in accordance with your Linux version 6. Reboot your system by combo keys Ctrl + Alt + Del

CentOS 7 內 apache 2.4.6 強制使用 https

圖片
1. 編輯 /etc/httpd/conf/httpd.conf,加入如下藍色選項 <VirtualHost *:80>     ServerName www.mylinux.com.tw     DocumentRoot /var/www/html     Redirect permanent / https://www.mylinux.com.tw </VirtualHost> 2. systemctl restart httpd # 重新啟動apache 或 利用 .htaccess,適合租借空間 RewriteEngine on RewriteCond ^80$ RewriteRule "^/?(.*)" "https://%{HTTP_HOST}/$1" [R=301] (圖一) 參考自: https://www.centos.org/forums/viewtopic.php?t=62079 https://wiki.apache.org/httpd/RedirectSSL#Using_virtual_hosts_.28using_redirect.29

合併CentOS6 DVD

1. 從  http://isoredirect.centos.org/centos/6/isos/x86_64/  , 下載CentOS6 原始文件 Disc 1 , Disc2 2. 將 Disc2 光碟內 Packages/*.rpm 之所有rpm檔複製進Disc1 Packages/ 3. 新增Disc2 光碟內 Packages/TRANS.TBL 內容至 Disc1光碟內 Packages/TRANS.TBL 內容,並將每行資料重新排列後儲存,可利用指令 sort TRANS.TBL 4. 這樣可完成合併成一張DVD,也方便 PXE BOOT 做單一印象檔與Kickstart自動安裝 CentOS自己有出 shell script 來幫助合併 https://wiki.centos.org/zh-tw/TipsAndTricks/CDtoDVDMedia

在Linux內轉換文件內字元編碼

在Linux下利用 iconv指令轉換字元編碼,須先下載 libiconv 套件 使用方式 $ iconv  -f Big5 -t utf-8 big5_file.txt > utf8_file.txt 或 $ iconv  -f  ISO-8859 -t  utf-16  -o  utf16_file.txt  iso8859_file.txt 查詢參數 man iconv

Windows PE 或 Windows 安裝片製作自訂驅動程式方法

圖片
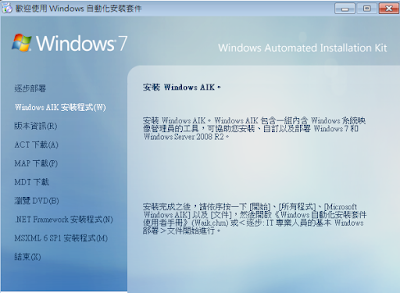
1. 先由  MS Windows 網站下載 AIK / ADK 來安裝 Windows PE Windows 7 sp1 https://www.microsoft.com/zh-tw/download/details.aspx?id=5188 https://www.microsoft.com/zh-tw/download/details.aspx?id=5753 Windows 10 https://docs.microsoft.com/en-us/windows-hardware/get-started/adk-install (圖一) 利用 setup 安裝後(請記得安裝部署與Windows PE),如圖一 2. 若為windows安裝光碟檔,將win7.iso下載後,可利用7zip解壓縮並放在 c:\download\win7 將下載的驅動程式如 intel usb3 xhci(C216與C220)或 nec usb3 driver 或 intel ethernet driver(100M/1G/10G/40G),或realtek ethernet driver ,可從 www.intel.com找到。解壓縮後,找尋子資料夾Driver,x64或x86內的.inf,.dll,.sys全部或分類(若有重複檔名)的複製到 c:\download\driver或以下分類名稱,如c:\download\driver\intelusb3_c220,並新增掛載暫存資料夾,c:\wimimage 3. 利用管理者權限開啟部署工具命令提示字元,準備掛載 .wim 映像檔。 若要修改windows安裝光碟檔,需利用以下掛載 dism /mount-wim  wimfile:c:\download\win7\sources\boot.wim  /index:1  /mountdir:c:\wimimage dism /image:c:\wimimage  /add-driver /driver:c:\driver\intelusb3_c220 /recurse /forceunsigned dism  /unmount-wim  /moun...