發表文章

目前顯示的是 11月, 2019的文章

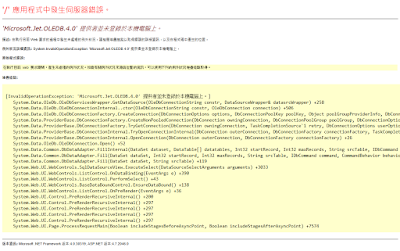
解決'Microsoft.Jet.OLEDB.4.0' 提供者並未登錄於本機電腦上

圖片
1. https://3ctipsmemo.blogspot.com/2017/07/ms-windows-iis-10-x64.html 2. download Microsoft Access Database Engine 2010 可轉散發套件 Microsoft Access Database Engine 2016 Redistributable https://www.microsoft.com/en-us/download/details.aspx?id=54920 please uninstall 64bit Microsoft Office before install Access Database Engine 2010  Reference https://social.msdn.microsoft.com/Forums/zh-TW/c55decf8-53a4-4c82-8aa3-d9f3e6c627c0/microsoftjetoledb40?forum=238

To print message in a box on CentOS 8

$ dnf  install boxes $ echo 'Merry Chrismas and Happy New Year 2020! ' | boxes -d santa -a c Reference https://boxes.thomasjensen.com/download.html https://www.tecmint.com/boxes-draws-ascii-art-boxes-in-linux-terminal/

Installing WineHQ on CentOS 8

1. download from https://dl.winehq.org/wine/source/4.0/wine-4.0.2.tar.xz 2. tar Jxvf wine-4.0.2.tar.xz 3. cd wine-4.0.2 4. ./configure --enable-win64 5. make && make install reference https://tecadmin.net/install-wine-centos8/

CentOS/RHEL Linux 設定IP轉址與設定調整一臺主機多網卡之靜態route優先權

圖片
1. sudo vim /etc/sysctl.conf to modify net.ipv4.ip_forward or sudo sed -i 's/net.ipv4.ip_forward=0/ net.ipv4.ip_forward=1/g' /etc/sysctl.conf sysctl -p  2. permanent setting in /etc/sysconfig/newtork-scripts/route-eXXXX if nm-bond0 is default router touch /etc/sysconfig/network-scripts/route-enp2s0 echo '192.168.2.0/24 via 192.168.1.1 dev nm-bond0' >> /etc/sysconfig/network-scripts/route-enp2s0 $ route -n    #route $ sudo route del default dev nm-bond0 $ sudo route del default dev enp2s0 $ sudo route add default  via 192.168.1.1 netmask 0.0.0.0 dev nm-bond0 metric 0 $ sudo route add default  via 192.168.1.1 netmask 0.0.0.0 dev enp2s0 metric 1 將 script 加入 /etc/rc.local,讓開機即可改變 #Centos Linux 7 nmcli connection show dev enp5s0 | grep ipv4 nmcli connection modify enp5s0 ipv4.route-metric 0 nmcli connection modify enp2s0 ipv4.route-metric 1 nmcli connection up  enp5s0 nmcli connection up  enp2s0 參考 https://unix.stackexchange.com/questions/34497

Enable the IPython Clusters tab in Jupyter Notebook

圖片
downloaded and preinstalled python3 from https://www.python.org/downloads/   @ on MS Windows 1. python get-pip.py             2. pip install jupyter 3. pip install --upgrade ipyparallel 4. jupyter serverextension enable --py ipyparallel --user     jupyter nbextension install --py ipyparallel --user     jupyter nbextension enable --py ipyparallel --user 5. ipcluster nbextension enable 6. jupyter notebook # on Windows path: C:\Users\%USERNAME%\AppData\Local\Programs\Pytho n\Python36\Scripts\jupyter-notebook.exe @ on CentOS Linux 8 I. pip install jupyter II. pip install --upgrade ipyparallel III. jupyter-serverextension enable ipyparallel --py --user jupyter-nbextension install ipyparallel --py --user jupyter nbextension enable ipyparallel --py --user IV. ipcluster nbextension enable VI. jupyter-notebook&   @ on Mac OS X (if python 3.8 installed) Path of jupyter-notebook /Library/Frameworks/Python.framework/Versions/3.8/bin/jupyter-notebook type  python -m pi

Hanoi tower problem with recursive solution

https://www.geeksforgeeks.org/c-program-for-tower-of-hanoi/ http://mathworld.wolfram.com/TowerofHanoi.html

密碼生成網站

感謝大神 創造 https://passwordsgenerator.net/ https://passwordsgenerator.net/plus/ 加密生成網站 https://passwordsgenerator.net/sha256-hash-generator/ https://passwordsgenerator.net/md5-hash-generator/ https://passwordsgenerator.net/sha1-hash-generator/ https://passwordsgenerator.net/sha512-hash-generator/ Base 64 https://passwordsgenerator.net/base64-decode/ Name https://passwordsgenerator.net/name-generator/ Counts Char https://passwordsgenerator.net/character-count/ QRcode https://passwordsgenerator.net/qr-code-generator/